


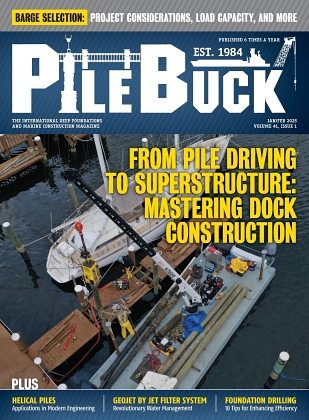

Sheet Pile Driving Tips
- First ….. Review your site investigation reports (whether soil boring, SPT or CPT reports) to anticipate “possible” driving conditions
- Especially for jobs that are challenging, perform a pile driving simulation to confirm that the sheets can be driven to the target depth with the selected Vibratory Driver.
- Inspect your sheets. Work only with undamaged sheets.
- Piles must be straight or driving will be difficult. All sheets should be inspected for excessive “camber” or “sweep”.
- Interlocks must always be free of any dirt, sand, mud or other debris.
- Tight interlocks can be just as difficult to drive and keep plumb as loose Check with the manufacturer as to “within tolerance” specifications.
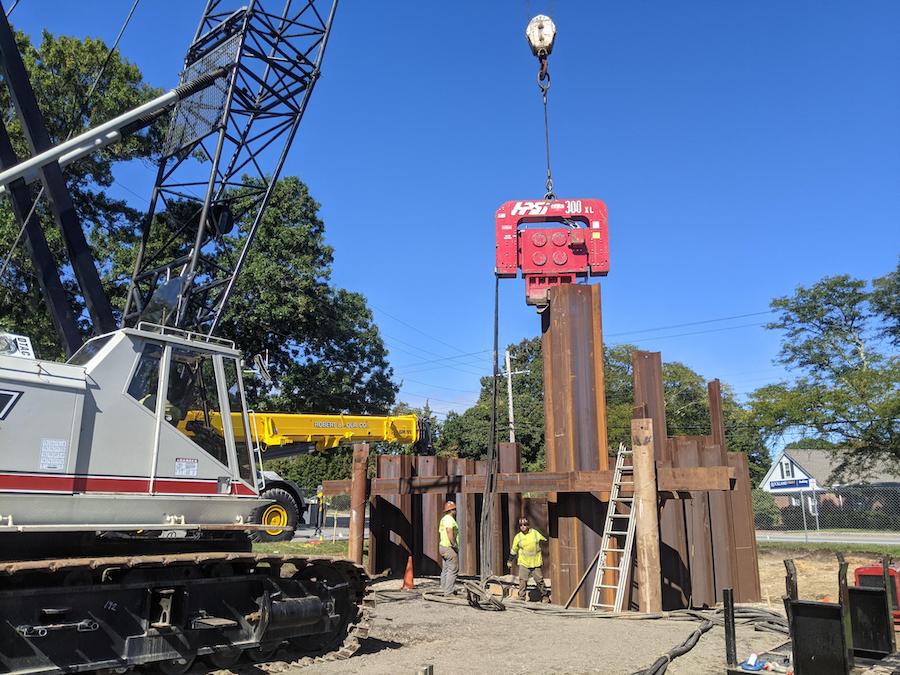
- Always set-up a Template System. In addition to driving a straight wall, A Template or Guide System will also aid in keeping sheet pile plumb when excessive driving conditions exist or when an obstruction is encountered. In short, a good Template System leads to good sheet pile construction.
- A “two level” Template or Wale System is generally suggested. In tough driving and/or when driving “deeper walls”, a front as well as back wale or bracing system is suggested.
- Always lift sheets properly. Utilize the lifting (handling) holes or proper “pick-up” points.
- Always protect the interlocks. Sheets with damaged interlocks are extremely difficult to drive and in some cases may affect the integrity of the wall.
- The crane boom length must always be long enough to thread additional sheets. This is normally at least twice the length of the sheets being driven, and then some.
- Whenever possible, attempt to drive sheets with the male interlock, ball or thumb etc. leading. This will aid in eliminating the possibility of the sheet developing a “soil plug”. The interlock filling with soil, sand or mud etc.) If a sheet must be driven with the female or socket end leading, a bolt or other object may be inserted at the bottom of the sheet to keep the interlock free from filling up with soil or other debris during driving.
- When utilizing a Vibratory Driver/Extractor always make sure all “Jaw Teeth” are on the sheet prior to clamping and driving. The grip should be equally divided (centered) between the two sheets. By the same token, when utilizing an Impact Hammer, ensure that the hammer being utilized has the proper head (helmet) for the type of sheet being driven as well as being centered on both sheets prior to driving.
- When threading (sometimes referred to as “pitching”), aligning and plumbing the first two sheets, always drive this first pair carefully and accurately, periodically checking to see that the sheets are plumb. This includes proper lateral, longitudinal as well as vertical alignment.
- Whenever possible it is recommended to drive sheets in pairs.
- Some contractors will knotch (cut-out) a portion (approx. 3-4 inches) of an interlock “face” as to aid in threading additional sheets. If the sheets are being rented, to avoid high “liquidated damage” charges you may not want to do this.
- Never rush the Pile Buck! Threading sheets can be a difficult and dangerous When “longer sheets” are driven, a contractor may choose to utilize a Pile Threading Device.
- When threading sheets “letting the sheet freefall” and drop to aid in penetration as a result of its own weight will generally cause the sheet to set “out of plumb”. This is not recommended.
- Thread only the remainder or portion of wall “protected” by the Template System.
- When threading, aligning and driving the last pair of sheets, once again periodically stop to make sure the sheets are plumb. This method is sometimes referred to as “panel” driving the sheets. In this method the first pair is plumbed and partially driven. Succeeding sheets in the first “panel” are then threaded until five or ten pairs are in place. The last pair in this group is then plumbed and also partially driven. Following partial driving of this end pair, the hammer works on successive pairs proceeding back to the beginning of the wall. The last pair set is not driven to grade since it will now be the first pair in the next panel.
- While there are no rules for installation experience has indicated that once the sheets are set and ready to be driven, they should be “Gang Driven”. This is sometimes referred to as “Driving in steps”. That is to say the sheets should be driven a short length, and then another short length, and so on in sequence until the desired depth is obtained. The steps can be set up for the whole wall or the wall can be divided in sections and each step is a “step behind” the one behind it. This minimizes the risk of an undriven sheet cocking with a full driven neighbor, with the potential of skewing the entire wall. It is important here not to make the steps too long or to drive a sheet pile too far ahead of its neighbor.
- Whether it is referred to as Panel Driving, Gang Driven, Driving in steps or whatever, Sheet Piling has a tendency to lean in the direction in which the wall is being driven. Number one, start with a Good Template System, and Number two if your wall starts “walking” (creeping) this must be corrected immediately! Even if it requires going back and extracting or partially extracting a few sheets, doing a lot of tugging, pulling or jacking, in the end it will be well worth the effort.
- Never overdrive. Are sheets bending, bouncing or vibrating with no penetration? If so, you’re either overdriving, hit an obstruction or need a larger Vibratory Driver/Extractor or Impact Hammer.
- Stop driving when a sheet hits an obstruction. Try. next pair – if these are also obstructed move on to the next pair or until such time an unobstructed pair is When these are located, drive these only a short distance below the obstructed piles then move on to the next pair. Return to the obstructed sheets and attempt to drive later.
- Some contractors recommend not driving a sheet more than 1/3 its length before driving the adjacent pile.
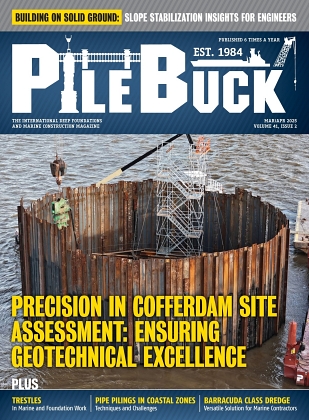
- Cellular Cofferdams require all sheets to be set and “closed” prior to any driving.
- And finally . . . never rush the Pile Foreman!
What are some important tips for sheet pile driving?
Some important tips for sheet pile driving include: 1) Proper planning and preparation, 2) Correct alignment of piles, 3) Using the right driving equipment, 4) Carefully controlling driving energy and blow count, and 5) Monitoring the condition of the pile during driving. Each of these steps is critical to ensure the efficiency and safety of pile driving operations.
Why is it essential to properly align piles during sheet pile driving?
Proper alignment of piles during sheet pile driving is essential to ensure the structural integrity and load-bearing capacity of the resulting pile wall. Misaligned piles can result in gaps between the piles, which can weaken the overall structure. Moreover, misalignment can lead to difficulties during the driving process and could potentially damage the pile or the driving equipment.